To many homeowners it feels as if Mother Nature is waging an all-out war on your home, and in some ways she is. Using rain, snow, wind, and pests to wear on a home’s roof, windows and siding, over time, these forces can create weaknesses at these barrier points, allowing water to leak inside. Once introduced, water can quickly deteriorate the wood structure of a home and if left unattended, the end result is always the same: expensive repairs and loss of equity. While this seems scary, fear not: its well within our powers to win the war against the elements.
Today, in this article, we’ll give you the knowledge you’ll need on how to identify and repair water damage in your home as well as sound advice on prevention.
Prevention
Before we get into fixing the repair, we did want to take a moment to talk about preventative maintenance. “An ounce of prevention is worth a pound of cure”; in the Home Repair business, no truer words have been spoken. With this in mind, make sure you have a short term and long term plan for the maintenance and eventual replacement of your roof and siding. Plan a long term budget for the replacement costs and stick to a rigid maintenance schedule to review any possible water entry areas on your roof and siding.
While it’s easy to drive yourself mad with lists, a simple annual checklist should suffice in most cases, however as your house ages and things life your roof start approaching their life-expectancy, you’ll need to be diligent in spotting potential weaknesses.
Below are a couple great online resources for preventative maintenance planning for your home:
Water vs. Termite Damage
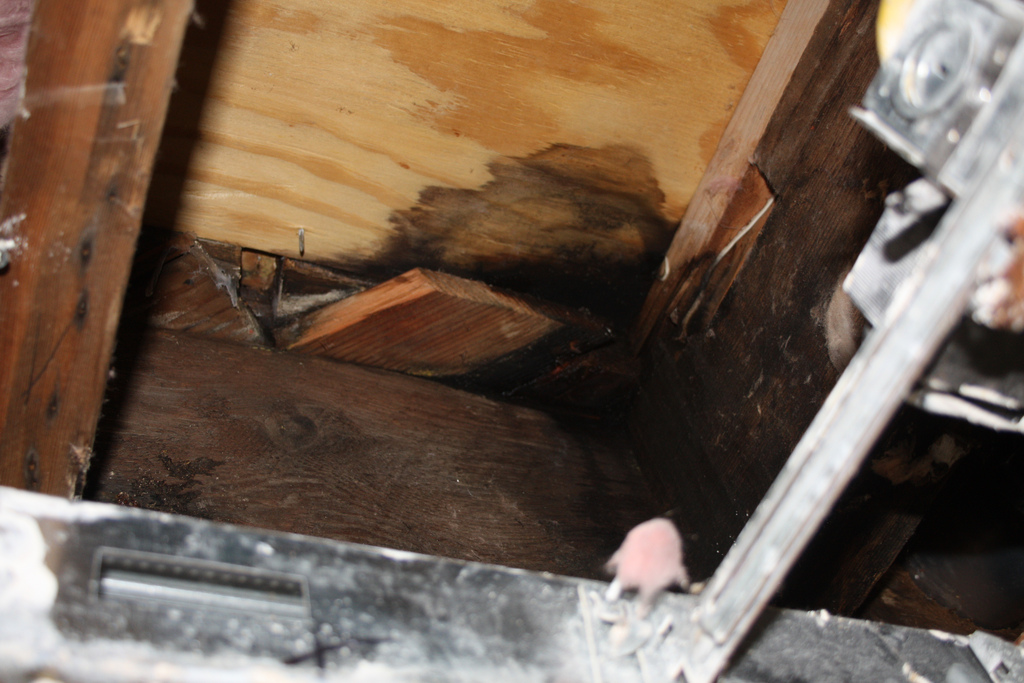
If, despite your best effort at prevention, you’ve identified a damaged or weak section in your exterior. You’ll need to assess if the damage is from the weather or pests like termites. While the wood repair may be the same, you’ll need to identify the long term fix as well.
Upon initial inspection, damaged wood from water (aka dry rot) looks similar to that of termites, and the best bet to identify which is which is by looking around the damaged piece of wood for termite tunnel, or mud tubes in the direction of the damage. If none are to be found, open up a section of the affected wood and look for the tell-tale sign of layered damage or tunneling within the wood. Water damaged, or dry-rot, wood won’t have this layered characteristic and may have a darker color indicating fungus or mold growth.
If you still have questions at this point, call in a professional termite or pest inspector to assess the damage.
Once the root cause has been identified and mitigated, you can now proceed in assessing the damage to repair or replace.
Scenario 1: Non Structural Wood
If the rotted wood is not in a place where it is providing structural support as in the case of non-structural wood like molding, cornicing or other decorative wood pieces, then you may find that you can repair it using nothing more than auto body filler; simply remove the section of rotten wood, let it dry (we use a hair dryer), fill in the hole using an auto filler epoxy, like Bondo, let the filler dry, sand it down, prime it and repaint the area.
NOTE: Be sure to use a breathing mask and goggles when sanding a fiberglass epoxy.
To reiterate, we recommend using this simple technique only for non-structural exterior areas. While fiberglass is great as a waterproof agent and can be used to enhance rigidity, it is not meant to be used by itself for structural support.
For more water damage involving structural wood issues read on…
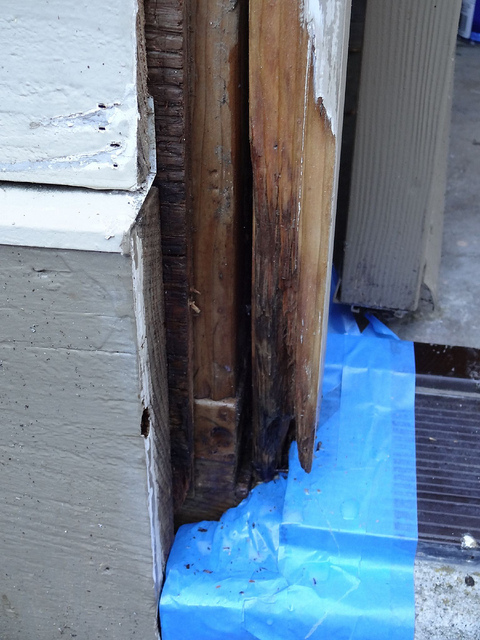
Scenario 2: Structural Wood
If the wood is providing structural support to your home then you will need to use a more aggressive solution. There are a number of penetrants that you can use to restore water damaged wood – these help to rebuild the wood and insect-proof it by penetrating deep into the wood, before hardening to strengthen it.
To use these products, locate the water-damaged area, and then drill a series of holes into it just one inch apart, working across the damaged area and a bit beyond. Use a syringe to inject the consolidant into each hole. Mix up some epoxy, and paint over the parts of the wood that are rotten, and use epoxy filler to re-shape the areas that are severely damaged, then sand it and paint it. Again, this technique will salvage most pieces of wood, as long as they are generally intact.
Scenario 3: Load-Bearing Wood
For extreme rot to a roof joist or a load-bearing wood beam, you should seriously consider replacing the wood entirely. However, before you do this it is a good idea to call out a qualified surveyor or a contractor that can assess the state of the wood and tell you whether it is safe to leave in place or whether it should be removed – as well as the safest way to remove and replace it if it is providing structural support.
If the piece is load-bearing, you’ll need to install a temporary supporting beam or header while you replace the damaged wood.
Need Professional Help?
Over the years we’ve been involved with dozens of projects where the homeowners could have avoided huge Roofing Costs involving repair and remediation had they just dealt with water damaged wood earlier. If you get anything from this article, remember: Do yourself a huge favor and deal with any wall or ceiling discoloration like it’s an actual roof leak.
If you’re not comfortable inspecting your roof and home or if the leak seems extensive, don’t hesitate to contact a professional like TRI Roofing. We service the Durham / Raleigh / Chapel Triangle and would be happy to talk to you about your specific needs. We’re happy to give out free advice too! Call us today at (919) 296-0017.